
How to Use a Yoga Strap for Back Traction
Struggling with back pain?
No inversion table? No problem.
Sometimes I link to products I love. As an Amazon Associate, I earn a commission from qualifying purchases.
Lower back pain sucks. Lots of people experience it and there’s no one quick cure that works for everyone, across the board.
Inversion and traction can be great tools for managing low back pain for some bodies. Going upside down can also help reset your nervous system and change your perspective (both literally and figuratively).
What happens when you go upside down?
Well, lots of things! Blood rushes to your head and your abdominal organs move closer to your diaphragm and lungs so breathing might feel different. Inverting also changes up the direction of the load gravity places on the spine. As a result, going upside down alleviates the downward load that compresses the vertebrae and discs of the lower spine. The decreased load can create a bit more space between the vertebrae and may help the discs to “settle in” between the bones.
In a clinical setting, a physical therapist might prescribe the use of an inversion table to help a patient with low back pain. For some bodies, the inversion table can be too intense. There is a way to get some of the benefits of traction at a lower intensity level. All you need is a yoga strap and a sturdy door!
What kind of yoga strap should I use?
I recommend using a D-ring yoga strap because they feel sturdier to me. However, the D-ring strap can be confusing the first time around.
How do I thread my yoga strap?
Hold the ring end of the strap in your right hand and the loose end of the strap in your left hand. Take the loose end through both the first and second rings. Then take the loose end over the second ring and back under the first ring (back toward your left hand). Pull the loose end with your left hand until the loop in the strap is your desired size. If you push back out against the loop (as if you’re trying to make the loop bigger), it shouldn’t move. This is important so test this before you proceed!

How to thread your yoga strap. ©KindBody Movement, LLC
How do I put the yoga strap around the door?
First you need to choose a sturdy door. Many of the interior doors in my home are hollow and I don’t trust the door frames (we’re a door slamming family) so I opt to use an exterior door. Be sure that there’s plenty of space for your body on the opposite side of the door swing.

Loop the strap on the in-swing side of the door. ©KindBody Movement, LLC
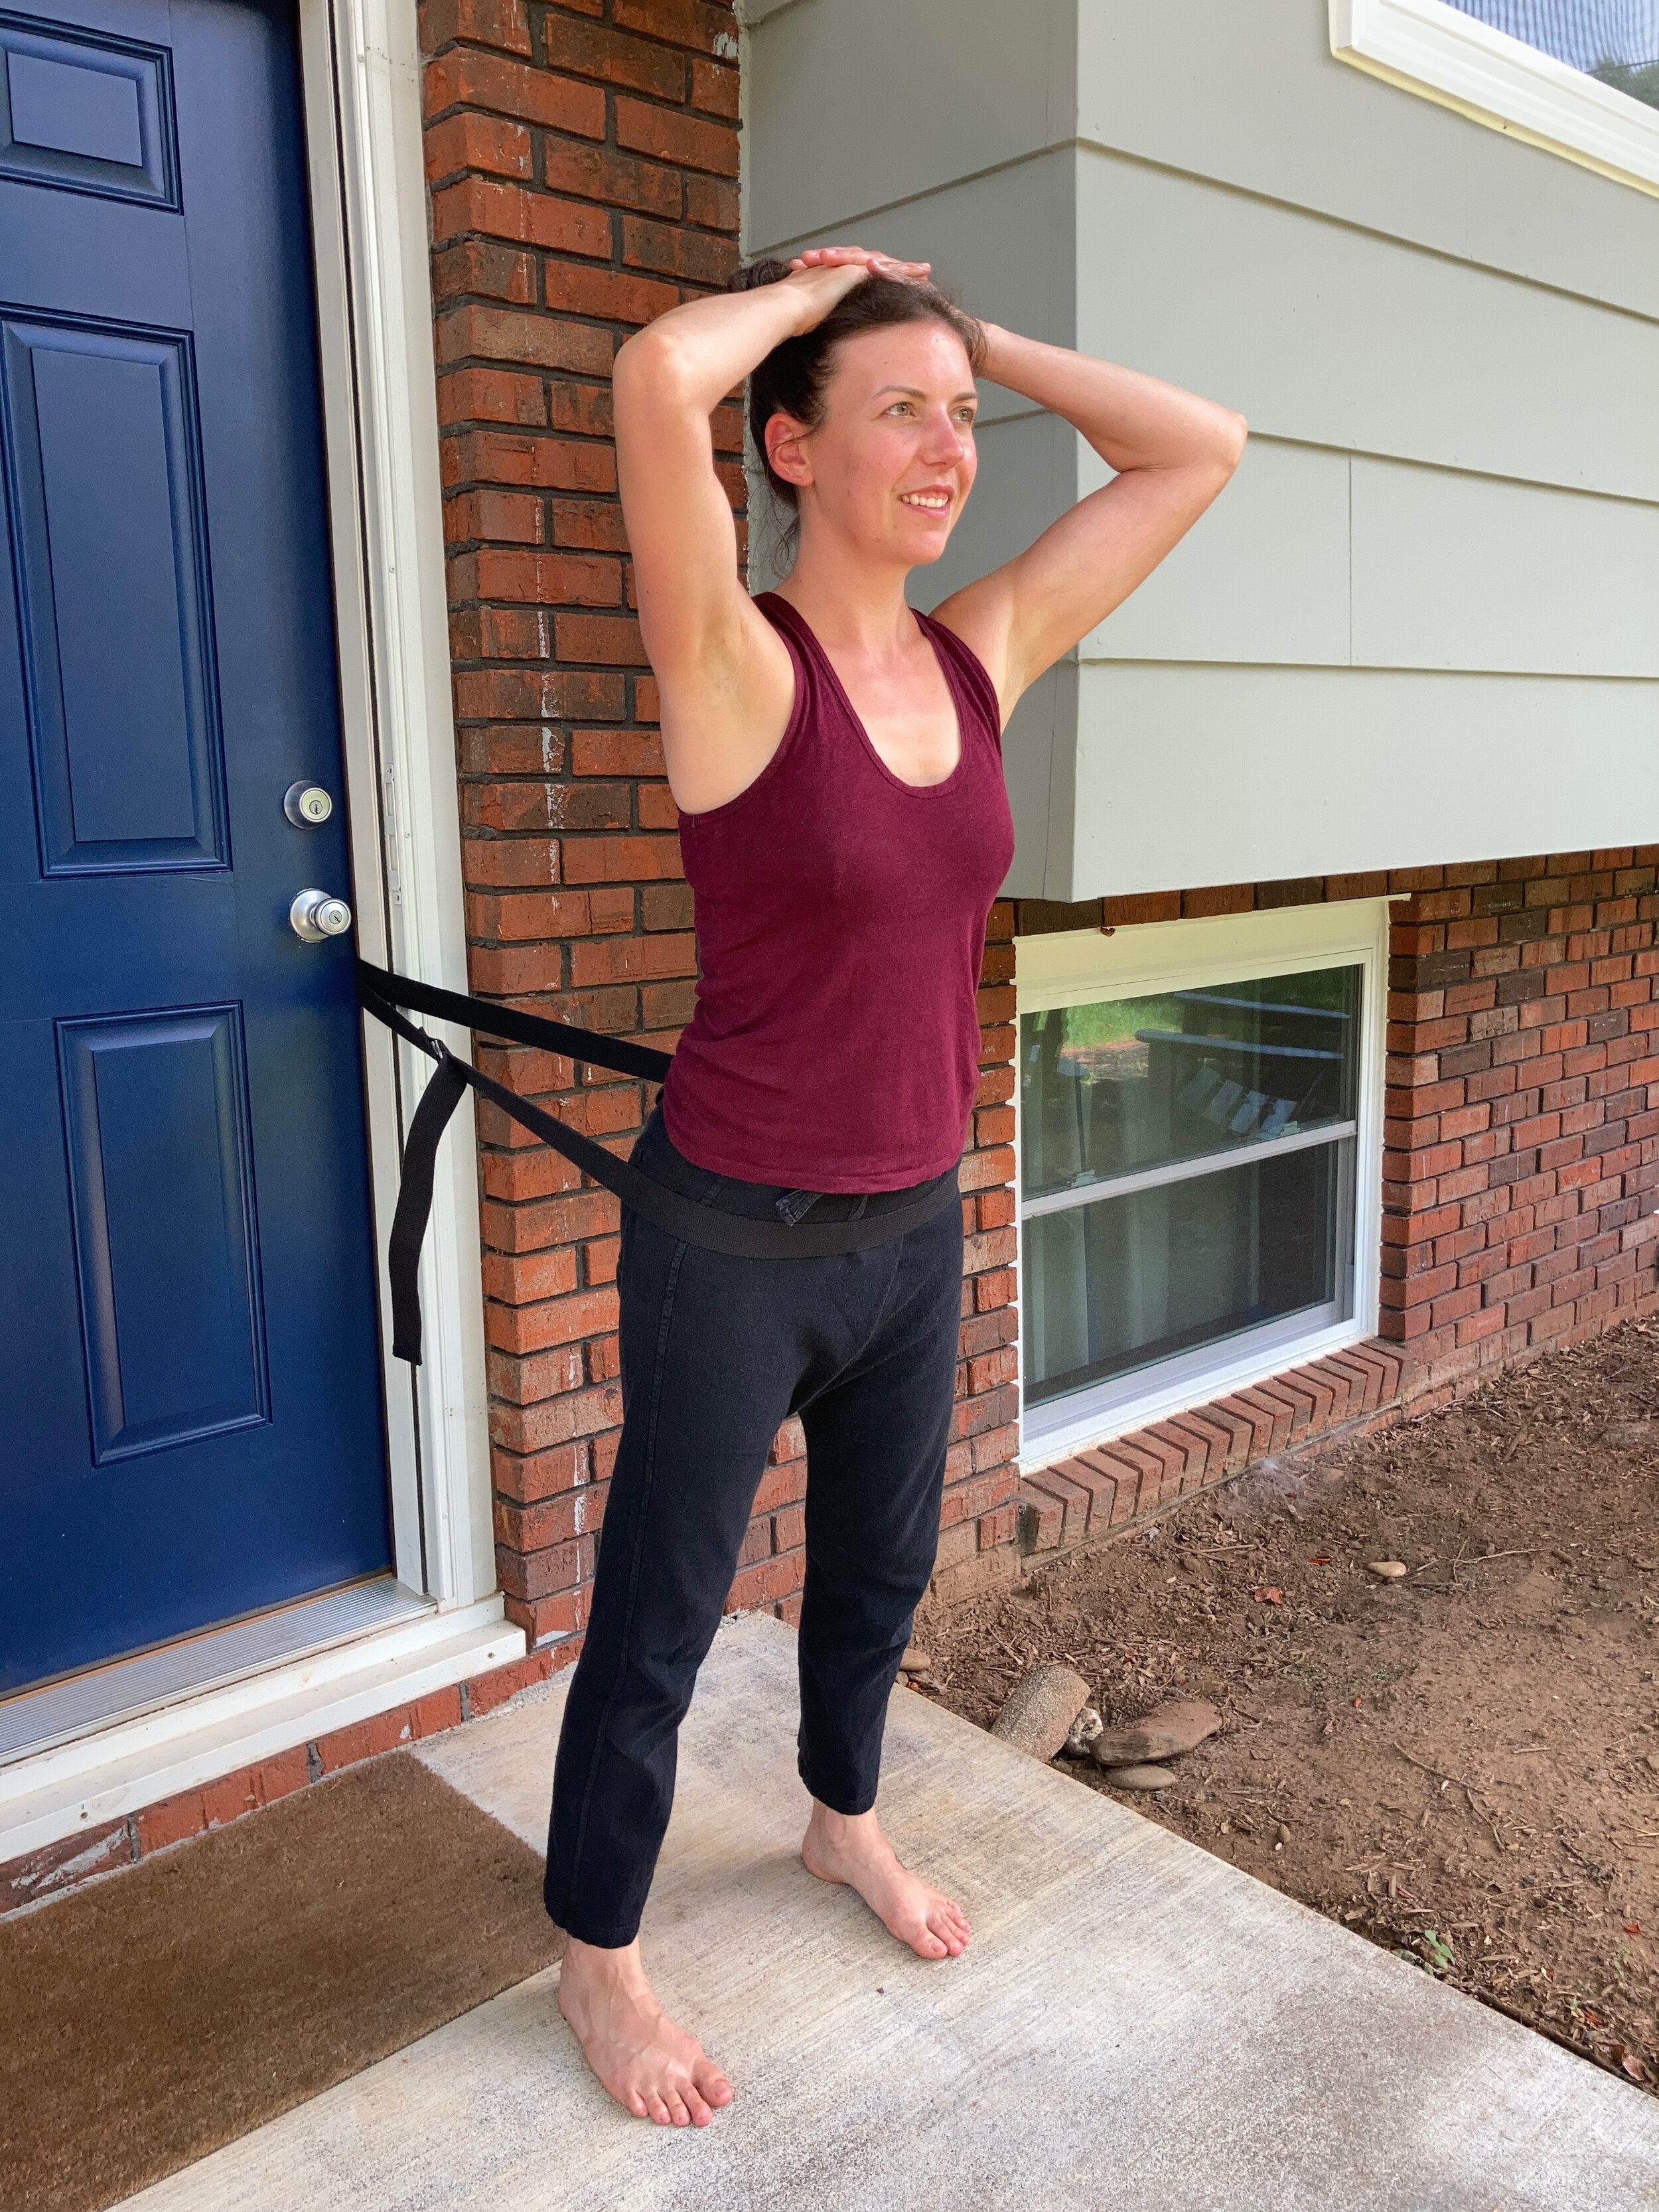
Now loop your strap around the door knob on the side of the doorway that swings in. For example, my front door opens into the entryway so I would loop the strap around knob on the entryway side of the door.
Taking care that the rings are out of the way and won’t get closed in the door, thread the strap in between the door and the frame and firmly close the door. Using my scenario, now I’m standing outside of my house with the long part of my strap.
Now it’s time to get strapped in!
Face away from the door and step into the loop in the strap. Position the loop just below your hip points.
Lean your weight forward into the strap to test its weight-bearing ability. (This should also help you to feel more confident trusting the strap.)
Lean your weight into the strap to test it out before coming into downward facing dog. ©KindBody Movement, LLC
Tip your pelvis forward to crease your hips (probably compressing the strap) and with a long spine reach your arms toward the ground. Your body should be in the shape of a downward facing dog. Feel free to bend your knees if the hamstrings feel tight. Your weight should be distributed between your feet and the strap; your hands or fingertips should be light on the ground.
You may find that you need to adjust your stance a bit. It’s okay to walk your feet a bit back toward the door, just support your weight with your hands on the ground before you try to move.
Hopefully you’ve found a comfortable place where you can rest in this shape and breathe. With each breath, feel your spine lengthening. Relax your neck. Work up to holding the position (as effortlessly as possible) for thirty seconds to a minute or a bit longer.

My hands are only resting on the ground—they’re not bearing my weight. ©KindBody Movement, LLC
How to exit the position.
When you’re ready to stand up—TAKE YOUR TIME! It’s normal to feel a little light-headed when coming out of an inversion so exit the shape slowly.
First, take some weight into your hands on the ground. Bend your knees as much as you need to in order to rock all of your weight into your feet. The strap may get a little lax at this point because your body should be supporting itself. As you exhale slowly and with control, keep your knees bent and roll your spine back up right. Your head is the last thing to lift.
Take a moment to feel grounded and stable before stepping out of the strap and opening the door.

Back traction using a yoga strap in downward facing dog. ©KindBody Movement, LLC
Conclusion
Obviously, an inversion table is ideal for back traction but not everyone has the space at home (or the the spare change) for one. By using a yoga strap and a sturdy door, you can still get traction and relief for your low back pain.


